
English
Views: 0 Author: Site Editor Publish Time: 2026-06-17 Origin: Site


Installing packaging equipment often introduces hidden operational friction. Without systematic execution, new machinery brings extended downtime and frustrating material waste. You expect immediate efficiency improvements on the floor. However, a poorly installed machine quickly becomes a major production bottleneck. This guide details the objective realities of installing and calibrating a heat shrink packaging machine. We bridge the critical gap between vendor promises and actual factory floor implementation. You will learn the exact mechanical standards and facility requirements needed for success. We ground these setup steps in operator safety protocols and proven mechanical calibration standards. Operations managers can use this technical roadmap. It helps evaluate setup complexity properly before finalizing any equipment purchase. Proper installation prevents chronic maintenance issues later. It ensures your packaging line operates at peak capacity from day one.
Facility readiness (power drops, pneumatic lines, footprint) dictates 70% of setup success before unboxing.
Thermal calibration and film threading are precision tasks; improper initial setup leads to chronic film waste and weak seals.
Different product profiles (e.g., rigid boxes vs. a Daily Necessities package machine setup) require distinct conveyor speed and tunnel temperature combinations.
Evaluating a vendor's implementation support and documentation is a critical Bottom-of-Funnel buying criterion.
Before moving any equipment onto the production floor, you must audit your facility. Adequate preparation mitigates operational risks and ensures smooth implementation. Managers often overlook structural facility limits. This oversight delays the entire deployment schedule.
Calculate the true footprint requirements of the system. Do not just look at the raw dimensions listed in the brochure. You must factor in necessary infeed and outfeed clearance. Forklifts need adequate turning radius to deliver bulk products to the loading zone. Operators require ergonomic access points. They must load products repeatedly and change heavy plastic film rolls safely. Maintenance teams also need designated access zones. Technicians must easily reach internal motors, conveyor chains, and heating elements without moving the machine later.
Match the machinery specifications directly to your existing facility infrastructure. A commercial-grade shrink wrap machine often requires robust power drops. You might need dedicated 220V or 380V 3-phase electrical lines. Inadequate voltage causes the heating elements to struggle. Next, validate your pneumatic capabilities. The pneumatic sealing bars require specific PSI and CFM ratings. If your factory air compressor lacks sufficient volume, the machine will suffer from weak seals. Insufficient air pressure prevents the sealing jaws from closing fully.
Assess the ambient temperature and ambient humidity in your planned installation zone. These environmental factors directly impact packaging material behavior. Cold drafts blowing near loading docks drastically reduce heating tunnel efficiency. The tunnel will fight the ambient cold air constantly. Excessive humidity alters the slip characteristics of certain plastics. Ensure a stable climate environment. Stable environments guarantee consistent wrapping results and prevent unexpected downtime.
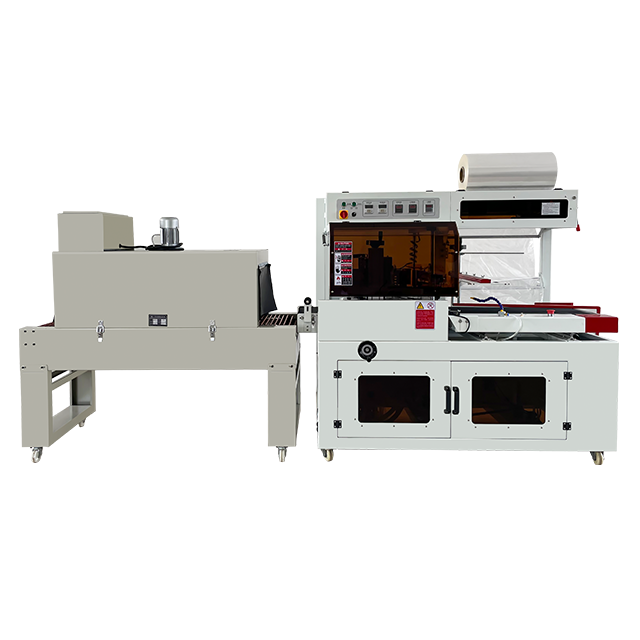
Now we move to the objective, step-by-step technical implementation. Following these exact procedures prevents early mechanical failures. Careful execution during the first day dictates long-term reliability.
Removing the shipping crating requires extreme care. Never pry wooden boards against the metal frame. You can easily bend delicate optical sensors or snap pneumatic air valves. Once unboxed, place the unit in its final position. Use precision spirit levels across the entire conveyor frame. A perfectly level frame ensures uniform product flow. It prevents the plastic material from tracking off-center during high-speed runs. Finally, anchor the leveling feet firmly. Anchoring prevents vibration-induced shifts over months of heavy operation.
Threading the material correctly serves as a mandatory foundation. Route the plastic sheet carefully through the sequence of dancer rollers. Pass it through the film inverter smoothly. Proper tensioning here prevents wrinkles downstream. Next, focus on the perforation wheels. These sharp wheels poke tiny, calculated holes into the material. The holes allow trapped air to escape rapidly during the shrinking phase. If you skip adjusting these perforators, your sealed packages will balloon and burst inside the heat chamber.
Begin by adjusting the sealing jaw height. The jaw center must perfectly match the maximum height profile of your product. Set the pneumatic sealing dwell time next. This dictates how long the jaws remain closed. Calibrate the blade temperature according to your specific material thickness. Polyolefin (POF), Polyethylene (PE), and PVC melt at completely different temperatures. Too much heat causes melted residue buildup on the cutting blade. Too little heat causes the seal to split open under tension.
Balancing the heating tunnel requires technical expertise. Machine features must translate into reliable, repeatable packaging outcomes. You must synchronize heat intensity with physical movement.
You must find the optimal thermal equilibrium. Running the belt too fast results in loose, sloppy wrap. Setting the temperature too low creates the same defect. Moving too slow causes unsightly burn holes. High heat and slow speeds can even melt your actual products. We recommend using a structured matrix to find the sweet spot.
Material Type | Conveyor Speed | Tunnel Temp (°C) | Potential Setup Issues |
|---|---|---|---|
Polyolefin (POF) | Medium (10-15m/min) | 150 - 170 | Shrinks too tightly if belt is slowed down. |
Polyethylene (PE) | Slow (8-12m/min) | 170 - 200 | Requires longer cooling times post-tunnel. |
PVC | Fast (15-20m/min) | 130 - 150 | Produces brittle, fragile seals if overheated. |
Convection air currents do all the heavy lifting inside the chamber. Direct the internal airflow baffles toward the bottom or sides of the package. This directional control ensures uniform shrinkage across all surfaces. Uneven airflow creates visible wrinkles on the trailing edge of the package. Adjust the blower motor speeds carefully. High-velocity air handles thick plastics well. Low-velocity air prevents lightweight items from flipping over inside the chamber.
Different product profiles require completely distinct tunnel configurations. For instance, configuring a daily necessities package machine for high-volume consumer goods demands broader heat tolerances. Variable-sized bottles, cosmetic boxes, and hygiene products pass through the tunnel rapidly. You need settings that accommodate slight shape variations. Conversely, uniformly shaped industrial parts might require highly focused, static heat parameters. Always tune your equipment based on the most difficult product in your catalog.
Even experienced factory technicians face distinct challenges during initial deployment. Recognize these common pitfalls early. Follow these transparent troubleshooting steps to solve problems fast.
"Dog Ears" and Corner Folds: These ugly triangular protrusions indicate insufficient heat delivery. They also stem from incorrect airflow direction inside the tunnel. Sometimes, operators simply leave an excessive material allowance around the product. Decrease the bag size mechanically to eliminate extra plastic.
Burn Holes and Wire Breakage: If you see dark burn holes, you are overheating the material. Slow conveyor speeds also trigger this melting effect. Frequent cutting wire breakage usually means the protective PTFE tape on the sealing bar is worn out. Replace the barrier tape immediately to restore clean, secure cuts.
Inconsistent Seal Strength: Weak seals ruin product integrity during shipping. This failure happens due to uneven pneumatic pressure across the sealing jaws. It also results from improper tension during the initial threading process. Re-check the dancer rollers. Ensure smooth, uninterrupted feeding off the supply roll.
Product Jamming at the Outfeed: Products bunching up exiting the tunnel point to speed mismatches. The tunnel belt might run slower than the sealing belt. Synchronize the speeds across both zones. Ensure cooling fans do not blow packages backward.
You must weigh setup complexity heavily during the decision stage. Use these evaluation dimensions to build sound shortlisting logic. Do not blindly purchase equipment based on maximum speed ratings alone. Consider how easily your team can actually deploy the system.
Assess your actual production floor realities. A standardized L-bar sealer often suffices for basic, low-volume operations. You can simply plug it in, thread it, and start wrapping. Conversely, a fully automated continuous side-sealer requires specialized technician commissioning. These advanced systems feature complex HMI touchscreens and synchronized servo motors. Do not buy a highly integrated system if you lack the internal technical staff to maintain it properly.
Look beyond the physical machine installation. Factor in OEM technician travel schedules for initial commissioning. Allocate dedicated hours for comprehensive operator training. You will generate noticeable test material waste during the early calibration phase. Recognize these resource demands early. Acknowledge the time required to achieve perfect production stability. Proper planning prevents deployment frustration and missed shipping deadlines.
Shortlist manufacturers based on localized support availability. Ensure they provide detailed, comprehensive video manuals. Written manuals often lack the visual clarity needed for complex threading paths. Responsive technical troubleshooting remains essential during the first week of operation. A reliable vendor answers the phone immediately when your sealing bar malfunctions on a Friday afternoon. Good support dramatically reduces your initial downtime.
Proper machinery setup goes far beyond simple maintenance checklists. It acts as the primary driver of your throughput consistency. Rushing the installation process leads directly to daily operational headaches. You must carefully factor setup complexity and post-sale vendor support into your final purchasing decision. Do not underestimate the value of a structured, step-by-step implementation plan.
Take actionable steps before committing. Always request the machine's installation manual upfront. Ask the manufacturer for a live demonstration of the material threading process. Verify these mechanical details before you sign a purchase order. Thorough evaluation ensures long-term operational success on your factory floor.
A: Setup times vary based on equipment complexity. Manual or semi-automatic systems generally take two to four hours to unbox, level, and calibrate. Fully integrated, automated lines running on 3-phase power usually require one to three days. This longer timeframe accounts for conveyor synchronization, pneumatic tuning, and factory commissioning.
A: It depends on the machine type. Basic 110V or 220V standalone units feature simple plug-and-play designs. Your in-house maintenance staff can handle these easily. However, heavy-duty 3-phase automated systems demand specialized factory commissioning. These units require complex pneumatic calibration and advanced software integration.
A: The most frequent error is neglecting to level the machine properly. An unlevel frame causes products to drift and film to track poorly. Incorrect film tensioning ranks second. Failing to route the film through the dancer rollers correctly results in chronic wrinkling and weak side seals.
A: Allocate at least one full roll of test material during the initial startup. You will generate noticeable waste while dialing in the temperature and speed matrix. Perfecting the tunnel airflow, sealing blade dwell time, and perforation alignment requires trial and error before achieving production-ready packages.


